Learn how to load film on a Zeiss Ikon Nettar Medium Format Camera
Read MoreLoading Ilford Delta 400 on Zeiss Ikon Nettar
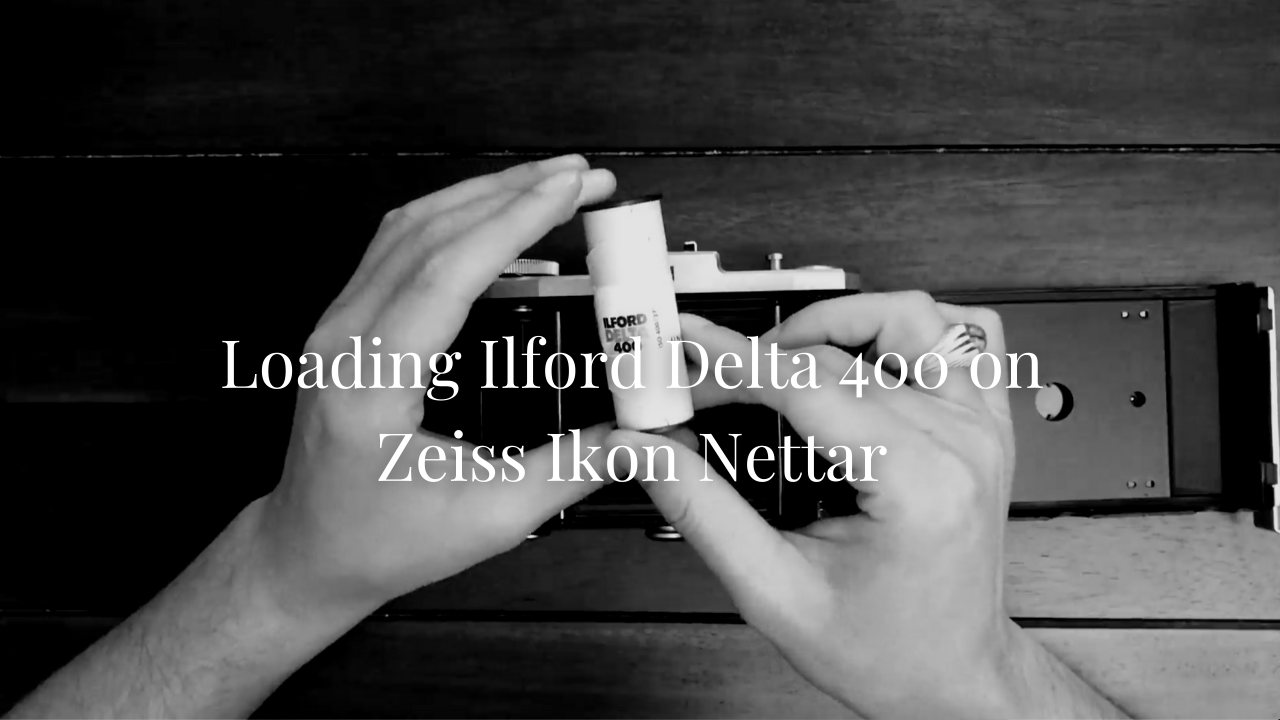

Learn how to load film on a Zeiss Ikon Nettar Medium Format Camera
Read MoreA simple introduction to the Zeiss Ikon Nettar, Medium Format, 6x6 camera.
Read MoreIlford HP5 Plus is a great film stock for anyone who wants to create drama and atmosphere in their images. It's wide exposure latitude is great for anyone new to trying this film so you really can't go wrong. It may not be the preferred choice of film for those who are more technical. If you're looking to shoot landscapes then this is probably not the right film because of the grain.
Read MoreWhatever you may have heard, shooting film is generally quite an expensive venture. So why not try and find a way to make it just a little more affordable than usual? With that in mind, I went off searching for expired film. I had for a while wanted to shoot on Velvia Fujichrome 50 but I hadn’t really set an intention of specifically looking for this film when I went about researching. After googling expired film online and then venturing through eBay, I looked through quite a lot of different rolls available online. At the time, I knew I wanted to shoot Medium Format so at least that narrowed the search down to 120 film roll.
eBay became the main source of expired film researching. In a way, it is pretty lazy but made logical sense with the ease of the search process. Anyway, I narrowed the search focus to £10 and this helped to filter the results. Lots of different rolls available from Black and White to Colour Reversal films. Film stocks which were recently expired were generally the most expensive. As a rule of thumb, as the age of film increases the cost of film decreases. However, the bidding process online I feel adds an inflated price to the film stock which is based more on desire than in actual practical value of what is being bid for.
Velvia Fujichrome 50 is a well-respected and well sought after film. If you’re serious about your photography at some point you have purchased this film for your own use. After much research about this film stock on online forums and discussions with fellow film photographers I was quite excited when I first came across this batch of expired roll from 1998/99. The images showed generally well looked after boxes of the film and whilst I didn’t know how well they had been stored (Refrigerated film is the most sought after!) it fit my price point for £10 so I threw it in the virtual basket and parted ways with some sterling electronically.
I wanted to explore something away from the city so chose a seascape location that I had never been to before. Eastbourne looked like a good shout and had some variety which would fit in nicely with some film photography. Every journey is made more enjoyable with some company, so Lucas joined along for the drive down. I packed up my cameras and asked Lucas to bring along his Yashica Mat 124G which he had been raving about for a while now. He had been given this camera from a friend of his he found it lying around and thought Lucas would probably make better use of it. I figured why not? Just see what happens with the Velvia?
Traffic was quite heavy on the way in and admittedly I had not really planned out a route to a specific point. A bit of fly-driving led us to some fortuitous free parking near the beach. The weather however was holding up and plenty of good light with some cloud. We headed out and dumped our gear on to the beach. After scoping out the options we metered up and then Lucas pulled out the Yashica Mat 124G. The wind was picking up so with his back to it, he briskly loaded up the film in the cold breeze.
The Yashica had been through a lot. It reminded me of when I took my Nikon for a service a few years back and the delight to which the shop keeper had for seeing such a worn camera. The camera’s scratches are just a testament to the quality of the product but also that it was used for a purpose. It wasn’t just a keepsake. I dialled in the ISO settings and adjusted the shutter speed in line with the on-board light meter - it was working just about right when matched with my handheld light meter.
The TLR format gives you a totally unique experience. Adjusting to the waist level finder is fun along with everything flipped the other way! At first you have to adjust and get used to the setup. It can be quite easy for you to walk around with the camera like a duck with its head stuck in the sand - but with a view! Be careful, if it’s your first time walking around with one, you can easily lose awareness of what is around you.
Seeing things from a new perspective got me moving and interacting with my surroundings in different ways. It almost feels like you are more connected to your frame and along with the limit of 12 shots on the roll you take much longer and think more carefully about the shot you are about to take. If you don’t own a TLR but would like to get an idea of partially what it’s like you could hold your phone or SLR at waist level and click away (mind you that would not be the same experience in many ways!).
Given the age of the Yashica, I wasn’t surprised to find there were some issues with shutter. A few times I was left thinking whether the shutter was still stuck inside and whether I had overexposed the shot or not? Other times it worked just fine. Seeing that I have some spare roll, I’ll need to give those a whirl to see if my hypothesis is correct! That’s for another time, however. I didn’t venture too far with the camera; time was limited as it was late afternoon. I focused on getting some street style snaps of people walking by and then took a few of the buildings along the walkway before turning back towards the ocean to finish off the roll.
All in all, it was a fun experience, I’m quite pleased with the outcome, even though it was just 3 shots. The shots themselves had lost their colour rendition but a little tweak in Adobe Lightroom into Black and White really made the images grainy and textured. The images communicated of a time gone by and I really loved what I got!
One afternoon in Central London with a roll of Ilford XP2 Super 400 and a Nikon FA
Read More“If you think that money will buy you anything and everything, you have never ever had money”
Lauren Greenfield examines materialism, celebrity culture, and social status and reflects on the desire to be wealthy at any cost. This visual history of the growing obsession with wealth uses first-person interviews in Los Angeles, Moscow, Dubai, China and around the world to bear witness to the global boom-and-bust economy and to document its complicated consequences.
“Societies accrue their greatest wealth and the moment they face death”
Generational Wealth is a documentary produced by photographer Lauren Greenfield. The documentary looks at American celebrity culture, materialism and the 'get rich quick' mindset prevalent in society today.
In the documentary, Lauren takes us on a journey from the start of her photography career to the present day (2017). Lauren Greenfield began her photography career trying to photograph a Mayan village in Mexico for National Geographic. The project ends without abrupted as the funding stops, and Lauren returns to her native Los Angeles to start the project of her life.
Throughout her career, she has documented her human environment and the relationship between wealth and perceived social value that comes with it. In this documentary, she discusses the origin of her project and returns to meet her peers in 2017. The changes are remarkable and give an insight into the influence of wealth on a broad spectrum of society, from billionaires to single mothers.
“If I want to work a hundred hours a week and never see my family, die an early age, that’s my prerogative”
Lauren delivers her story with incredible ease and emotional intensity. With humility, she turns the camera on herself and her family too, revealing a deeper introspection and view of life in America today. At times you will be left shocked. As she flows from the discussion of the proliferation of porn culture, she moves into a very descriptive analysis of the impact of plastic surgery on women. A desire to remain young, particularly amongst women has an incredible toll on their mental and physical health.
Her story takes you on a rollercoaster of emotions, and she vividly describes how the drive to 'have it all' and 'make it big' has created significant societal change on the old and the young. The idea of the 'American Dream' has wholly changed to an obsessive society with the self at its centre. If you are one for introspection, you will take away much from this documentary.
“I would have money as big as this room and kiss it”
In conclusion, this documentary is very different from her first film 'Queen of Versailles,' where she views a glorious world as a spectator. Instead, she is immersed in this film, and she is also a subject. Covering twenty-five years worth of work, it certainly gives an insight into the personal and international impact of consumerism in the world today. If you are intrigued by our society, this film is a must-watch.
Photography has grown in popularity as it can capture human feeling and emotions, almost like no other medium. But where did it all start?
The origins of the first-ever camera can be dated back to the year 945 when an Arab scholar, Ibn Al-Haytham, created the 'camera obscura'. It was the first time a lens had been attached to a box-like structure to capture the light. However, he was unable to capture the image seen as there was no film to obtain it.
It would take another nine hundred years before images captured on paper became possible. Louis Daguerre, a French painter and physicist, invented the process in 1826. The first photograph took eight hours of exposure, and the quality of the image was quite poor. Louis would refine the 'daguerreotype' process over the next few decades. The updated 'heliographic' process he developed with collaboration with Nicéphore Niépce reduced the processing time to half an hour. The process would involve exposing an iodized silver plate in a camera which could capture the latent image on a plate developed by exposure to mercury fumes which were made permanent by solution in salt.
By the end of 1839, the 'daguerreotype' process would spread rapidly across Europe and North America. Travellers were beginning to capture famous monuments in Egypt, Palestine, Greece and Spain. A downside to using the lengthy exposures meant that moving objects were not capturable, and thus portraiture would be impossible.
The earliest known photography studio belonged to Alexander Wolcott in 1840. The 'Daguerrean Parlor' allowed individuals to have tiny portraits taken of themselves. In the meantime, work continued improving the capturing process. József Petzval working alongside Friedrich Voigtländer in Vienna, Austria would create an achromatic lens (removing the colours of light separated during the capture process). Voigtländer would make strides in making photography more practical. He reduced the size of the wooden box to a more easily transportable size.
By purchasing the rights to the American mirror camera and later Daguerre's, Beard employed John Frederick Goddard to accelerate the exposure process. Goddard would be successful in using silver iodide with bromine vapours to reduce the exposure time between one to three minutes. The first European studio would open soon after in London on March 23, 1841.
The ever-improving process would accelerate the growth of photography across the United States in the 1840s. By 1850 'Daguerrean artists' to be found in most towns and New York City there were already 77 known galleries. San Francisco's growth was meticulously captured and published in 1855.
The photographic movement was beginning to increase, and many different genres of photography have emerged since the early 1800s. The main styles are:
Monochrome
Pictorialism
Straight photography
Portraiture
Landscape
Street Photography
Colour
Nude
Still Life
Self-Portraiture
Abstraction
Avant-Garde
War
Propaganda
Ethnography
Photojournalism
Documentary
Humanism
Science
Art
Glamour
Pop
Society
Topography
Fashion
Advertising
Paparazzi
Conceptual
Staged
Performance
Contemporary Art
The Selfie
We will be coming back to look at each of these styles of photography over the next few months in more detail.
“You are an aperture through which the universe is looking at and exploring itself.”
Photo by Nathan DeFiesta on Unsplash
Read More“For the past forty years, I had never folded my own quilt, made my own bed, or poured out my washing water. I had never even washed my own feet or tied my shoes.”
The Forbidden City
Read More“Photography is deeply subjective. It is my way of seeing – my pictures are made with my political and ideological ideas.”
Sebastião Salgado
Read MoreAs part of a personal challenge during quarantine, I decided to create some self-portraits at home. It has been quite enjoyable using natural light as you may have seen from my previous post on this topic. In this post, I will discuss how I created this image and how I put the shot below altogether.
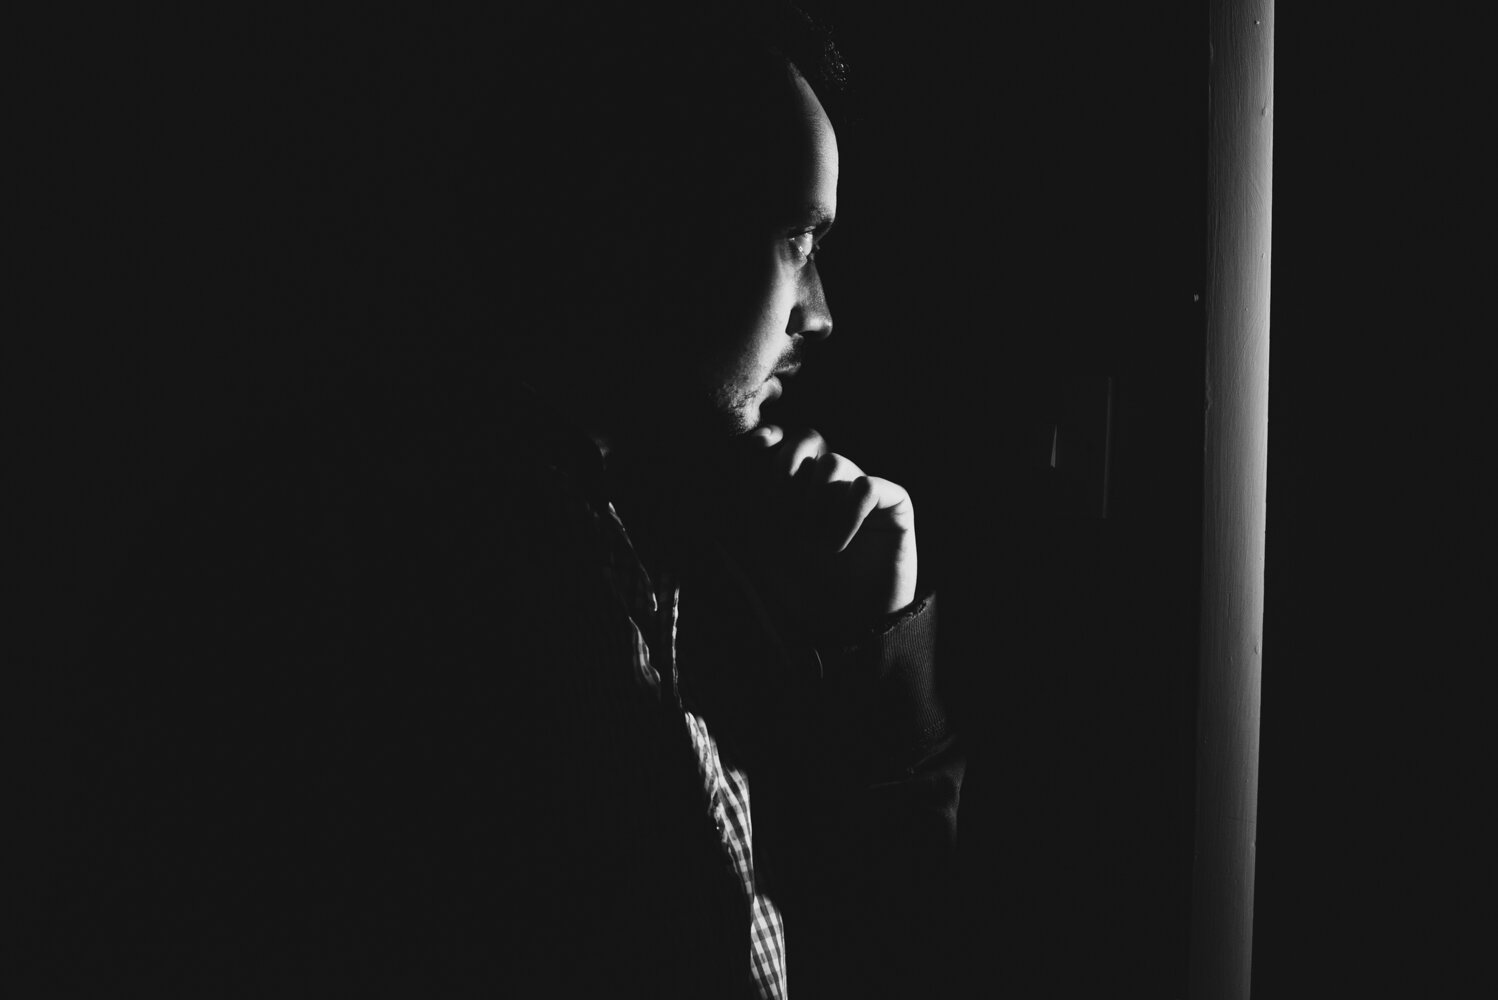
One light self portrait taken on a Nikon D800. Exposure 1/60 at f/8.
I used the Profoto A1 which is, an outstanding piece of kit. It allows modifiers to be attached magnetic, which is a dream. Simply pop on a grid or a coloured gel, and you're good to go!
I mounted this on the Magmod OCF Magshoe which I invested in after unwisely using a cheaper hot shoe mount for my Profoto A1. I was out shooting with The Creative Eye Photographers, our workshop group. With such events, you are moving around a lot, and any sudden movements can result in unfortunate things happening to equipment! Fortunately, whilst the A1 fell (pretty hard), it was only got a few scratches, but I didn’t put it back up on that cheaper mount again!
I absolutely swear by the MagMod, it is a well designed and solid piece of kit. You’ll hear everyone say it, if you have bought photography, don’t cheap out on accessories!

Profoto A1

Magmod OCF Magshoe

Manfrotto Stand
For this image, I wanted to create something dramatic. Before switching off the lights in the room, and I had placed my camera on a tripod to the right and tested a few shot using the timer function. Once I had something sharp I turned off all the lights and then took the shot. The first few attempts didn’t quite work and as I needed to adjust the power from the Profoto A1. I finally settled on a low setting (3.5) and then took this shot. I like the sliver of light coming through the door and how it gives just enough light on me to provide the viewer with a sense of depth and scale. The mood is also appropriate for the image taken.
Edited image in Adobe Lightroom CC
Read MoreThere are lots of different ways you can improve your photographic skills during this pandemic.
Take images of things that have inspired you. A book, magazine or perhaps even a note that you may have received. Reading anything is going to help you to reduce any stress or anxiety, increase your vocabulary as well as strengthening your brain!

Grow your photographic mind without getting your camera out. Read a book on an inspirational photographer. Here are some of my favourites
These books are a treasure trove as a synopsis of a project or other photographers life. You will learn many different ideas, and it will help to see your work in a different light.
Watch some documentaries related to your interests. Photographers are visual by nature; we like to see things, observe how they interact in the human and physical environment. We can’t all be out there all the time, but we can learn so much from some fabulous documentaries and films so readily available. Here are some for you to check out:


Visit online exhibitions of photographic work. Here are some useful resources for you! There’s nothing quite like going into an exhibition in town, but for the time being, there are some very cool alternatives for you to explore:
https://www.nationalarchives.gov.uk/online-exhibitions/
https://thephotographersgallery.org.uk
https://www.peabody.harvard.edu/all-exhibitions/54
You’re a doer; you might have a long checklist of things you want to get done during these unusual times. There are some fantastic free YouTube videos out there that can help you to develop your editing skills further, search out topics that get you excited. I find videos by Umesh very informative; perhaps this may be of benefit to you?
In this video I will take you through a very quick edit of a photo from a shoot. Here is the before and after.
Here is the video to take you through it step by step!

Before

After
Captured with a 50mm Nikon f/1.4
Read More“I don’t love Photoshop; I like imperfection. It doesn’t mean ugly. I love a girl with a gap between her teeth, versus perfect white veneers. Perfection is just... boring. Perfect is what’s natural or real; that is beauty.”
If you are a complete novice or looking to brush up your skills, this will be a useful blog for you. Understanding how to work with images in Photoshop is fundamentally important, so let's get started.
Let's start with an empty document.
Click on New or go to File>New
Now you will have some presets to select from - click the drop-down menu to see the options available. Click on 'Photo'
Now from the 'Size' drop-down menu let's select the standard Landscape 5 x 7 size
You'll notice that you can change the 'size' to whatever you'll like. You can also change the 'Resolution'. This is, in a nutshell, the 'print quality' so the higher the resolution is, the better the print quality will be - but the actual size of the printed image will be smaller. You can also choose from different colour modes- the default is RGB.
Let's open this into a new document by clicking 'ok.'
Let's save this as a Photoshop document by going to: File>Save As - now name your File whatever you would like.
You'll notice that the file name ends with '.psd' which means this will be saved as a Photoshop Document; however, you can change the format to a variety of different options by clicking on the 'Format' drop-down list. The best options are 'Photoshop' and 'TIFF' files because these can record layer information. These are extremely important in photoshop, so it is highly recommended to save in either of these formats. Now, click 'Save.'
Now you have a blank canvas you can do lots of different things. You can bring in images, bringing them together, retouch, paint, layer them.
Let's bring in an image, go to file and choose 'Place Embedded'. Now select a file of your choice. Once you have click 'Place'. Now you'll notice that Photoshop will try to fill the canvas with your image. Now you can make this smaller or larger by holding 'Shift' and 'Drag' your image- this will resize your image without distorting it. Then click on the image to move it anywhere you would like. If you don't hold down 'shift' on your keyboard when dragging it is you don't stretch the image. Once you're happy with the, resize just hit return on your keyboard or click the 'tick' icon.
Now you will have this image as a 'layer' inside the 'layers' panel.
Now repeat those steps and bring in another file. Now once again holding 'Shift' and 'Drag' your image down- this will resize your image without distorting it. Then move the image to the desired place.
You don't have to create a new document. You can open an image directly, and it will open up as a layer inside Photoshop. So, for example, go to File>Open - then open and image.
You'll notice the image is opened as a 'Background' layer. Each time you open up an image directly, it will be opened like this, and it will be opened separately in the tab area. You can easily switch between these tabs. By going to 'Window' > 'Arrange' you can find lots of different tile options, and Photoshop will automatically lay them out depending on which option you choose. You can always go back to the normal tab view by going to 'Window' > 'Arrange' > 'Consolidate to tab.'
Another way to import images is view 'Adobe Bridge' which comes within the Adobe CC package. This application will give you a much broader view of all the images on your computer rather than picking out one image at a time. If you double click on an image, it will automatically open in Photoshop. Always make sure you save any changes to your work. An * sign will appear next to your file name if it is an unsaved document in your tab so make sure you go to File> Save.
“Of the people, by the people, for the people”
An introduction to my travels in Beijing, China
Read More“Photojournalism is documentary photography with a purpose”
Photographer: W Eugene Smith
Read More“Necessity is the mother of invention. ”
The Selfie
Read More
How to keep shooting in quarantine
Top 5 tips to get you started
Self Portrait: Ahsan Abbas
Read More


